Spring AI MCP Server: Exposing Your Spring Boot App to AI Agents
After I published the Spring AI Agent Loops article three days ago, a reader sent me a message that I can’t stop thinking about:
“We built the agents, the tool calling, the memory tiers. Now our AI agents need to talk to our actual business systems. How do we expose our Spring Boot APIs so Claude, Cursor, and our own agents can call them?”
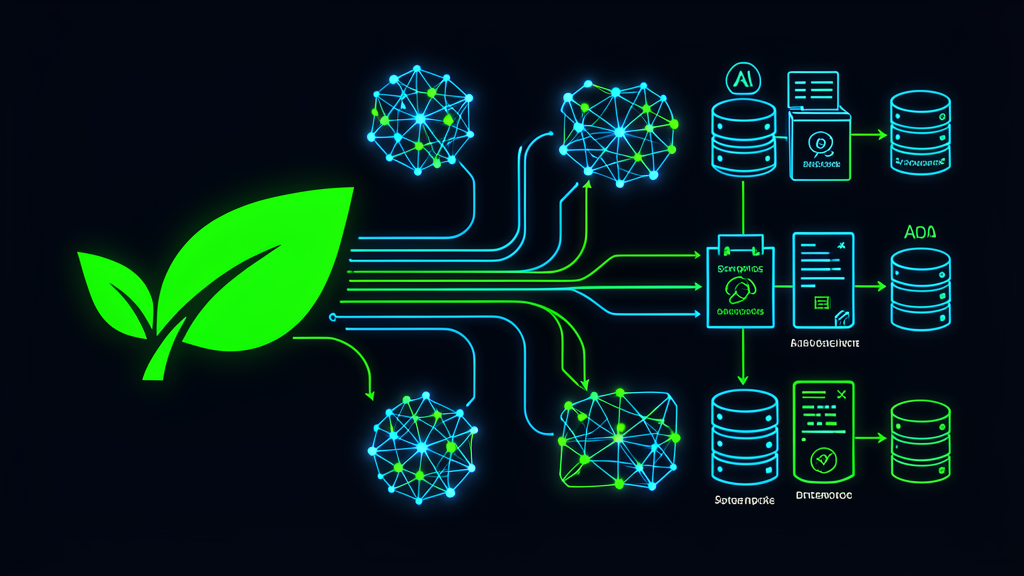
He’s right. The agent loops article covered the brain — how agents think, remember, and budget tokens. But a brain without hands is useless. Your agents need to reach into your databases, query your inventory system, check order status, and pull customer data.
That’s where MCP comes in. And Spring AI makes building MCP servers in Spring Boot surprisingly simple.
But simple doesn’t mean safe. After burning $47K on unchecked agent loops, I’m not going to let you make the same mistake with unchecked tool exposure. This article covers both: how to expose your Spring Boot app as an MCP server, and how to do it without creating a security nightmare.
What Is MCP and Why Should Java Devs Care?
The Model Context Protocol (MCP) is an open standard — created by Anthropic, now under the Linux Foundation’s Agentic AI Foundation — that defines a common contract between AI agents and external systems. Before MCP, every AI tool integration was a bespoke mess: custom adapters, one-off parsers, brittle HTTP calls. MCP standardizes the handshake.
The numbers are staggering: 97 million SDK downloads in just over a year. Backing from Anthropic, OpenAI, and Google means this isn’t a niche experiment — it’s becoming infrastructure.
For Java developers specifically, MCP matters because it flips the integration model. Instead of building a custom connector for every AI client (Claude Desktop, Cursor, VS Code, Gemini CLI), you build one MCP server and they all work. Same contract, same tools, same security model.
Think of it like what Spring did for enterprise Java in 2004 — except this time, the consumers are AI agents, not web browsers.
The Landscape: Spring AI MCP Server vs Quarkus vs MCP Java SDK
I researched every option before picking one. Here’s what exists:
| Framework | Startup | RAM | Transports | Security | Best For |
|---|---|---|---|---|---|
| Spring AI | ~3s | ~280MB | STDIO, SSE, Streamable-HTTP | OAuth2, @PreAuthorize (1.1+) | Spring Boot teams, fastest path |
| Quarkus MCP | ~30ms | ~30MB | STDIO, HTTP, SSE, WebSocket | OIDC, @RolesAllowed | Native images, density |
| MCP Java SDK | ~1s | ~80MB | STDIO | Custom only | Protocol purists |
| Micronaut MCP | ~1s | ~100MB | STDIO, HTTP | Transport context only | Micronaut shops |
I picked Spring AI for three reasons:
- We already use Spring Boot across our stack. Adding one starter dependency is not a framework migration.
- The annotation model is clean —
@McpToolon a method, and it’s an MCP tool. No builders, no SDK ceremony. - The Spring Security integration —
@PreAuthorizeon MCP tools is exactly what enterprise teams need (requires Spring AI 1.1+).
If your priority is startup time and container density, Quarkus wins hands down (30ms, 30MB native). But for teams already invested in Spring, the migration cost to Quarkus for an MCP server alone doesn’t justify the gains.
Your First MCP Server: Spring AI MCP Server Tutorial
Let’s build something real. I’ll expose a Spring Boot app that lets AI agents query an order management system — because that’s the #1 use case I hear from readers.
Step 1: Dependencies
<dependency>
    <groupId>org.springframework.ai</groupId>
    <artifactId>spring-ai-starter-mcp-server-webmvc</artifactId>
</dependency>
<dependency>
    <groupId>org.springframework.boot</groupId>
    <artifactId>spring-boot-starter-web</artifactId>
</dependency>
<dependency>
    <groupId>org.springframework.boot</groupId>
    <artifactId>spring-boot-starter-security</artifactId>
</dependency>
The webmvc starter gives you SSE (Server-Sent Events) transport — the right choice for web-based clients. If you’re targeting Claude Desktop specifically, use the plain spring-ai-starter-mcp-server for STDIO (Standard Input/Output) instead.
Step 2: The Service with @McpTool Annotations
@Service
public class OrderService {

    private final OrderRepository orderRepository;

    public OrderService(OrderRepository orderRepository) {
        this.orderRepository = orderRepository;
    }

    @McpTool(description = "Get order details by order ID. Returns status, items, and customer info.")
    public OrderDTO getOrder(
        @McpToolParam(description = "The order ID in format ORD-XXXXX", required = true) String orderId
    ) {
        return orderRepository.findById(orderId)
            .map(this::toDTO)
            .orElseThrow(() -> new OrderNotFoundException(orderId));
    }

    @McpTool(description = "Search orders by customer email. Returns list of matching orders.", readOnlyHint = true)
    public List<OrderDTO> searchOrdersByEmail(
        @McpToolParam(description = "Customer email address", required = true) String customerEmail
    ) {
        return orderRepository.findByCustomerEmail(customerEmail)
            .stream()
            .map(this::toDTO)
            .toList();
    }

    @McpTool(description = "Get the current status of an order: PENDING, SHIPPED, DELIVERED, or CANCELLED.", readOnlyHint = true)
    public String getOrderStatus(
        @McpToolParam(description = "The order ID", required = true) String orderId
    ) {
        return orderRepository.findById(orderId)
            .map(Order::getStatus)
            .map(Enum::name)
            .orElse("NOT_FOUND");
    }
}
Three tools. That’s all you need for a basic order query agent. The @McpTool annotation handles the JSON schema generation automatically — parameter names become tool arguments, return types become response schemas. The @McpToolParam(required = true) annotation marks parameters as required (don’t confuse this with @McpComplete, which is for prompt argument auto-completion, not tools).
I also added readOnlyHint = true on the read-only tools. This tells AI agents that calling these tools won’t modify any state — a small detail that helps agents reason about which tools are safe to call during exploration.
Step 3: Registration
@SpringBootApplication
public class OrderMcpServerApplication {

    public static void main(String[] args) {
        SpringApplication.run(OrderMcpServerApplication.class, args);
    }

    @Bean
    public ToolCallback[] orderTools(OrderService orderService) {
        return ToolCallbacks.from(orderService);
    }
}
ToolCallbacks.from() scans the bean for @McpTool methods and returns a ToolCallback[] array. That’s it. No manual tool definition, no schema writing.
Step 4: Configuration
For SSE transport (web clients):
spring.ai.mcp.server.name=order-management
spring.ai.mcp.server.version=1.0.0
spring.ai.mcp.server.protocol=SSE
For STDIO transport (Claude Desktop, CLI clients), you need to disable things that would corrupt the stdin/stdout stream:
spring.main.web-application-type=none
spring.main.banner-mode=off
logging.pattern.console=
spring.ai.mcp.server.name=order-management
spring.ai.mcp.server.version=1.0.0
This is the #1 gotcha. If you leave the Spring banner or console logging enabled in STDIO mode, the MCP client will receive Started OrderMcpServerApplication in 3.2s as part of the protocol stream and choke. I lost an hour to this.
Connecting Claude Desktop to Your MCP Server
Once your server is running, connecting Claude Desktop takes a single config entry:
{
  "mcpServers": {
    "order-management": {
      "command": "java",
      "args": [
        "-jar",
        "/path/to/order-mcp-server-1.0.0.jar"
      ]
    }
  }
}
Restart Claude Desktop, and it’ll discover your three tools automatically. Now when someone asks “What’s the status of order #ORD-4821?”, Claude will invoke getOrderStatus through your MCP server and return the answer.
The Transport Choice That Everyone Gets Wrong
This is where most Spring AI MCP articles stop. They show you @McpTool and call it a day. But the transport decision is the most consequential architectural choice you’ll make.
| Transport | Use When | Don’t Use When |
|---|---|---|
| STDIO | Claude Desktop, CLI tools (Claude Code, Gemini CLI), local dev | Multiple clients, remote deployment, need HTTP auth |
| SSE (WebMVC) | Web-based MCP clients, need Spring Security integration, already using spring-boot-starter-web | You need reactive streams, high concurrency |
| Streamable-HTTP | New projects, multiple clients, the recommended transport for Spring AI 1.1+ | You’re locked into legacy SSE-only clients |
Here’s the critical detail: Spring AI now recommends Streamable-HTTP over SSE for new projects. Streamable-HTTP handles multiple clients better, supports request/response patterns, and is the transport the Spring AI team is investing in. SSE is still supported but considered legacy.
However, there’s a catch: Spring AI’s MCP Security module (OAuth2, API keys, @PreAuthorize) is WebMVC-only. It does not work with WebFlux, and it requires Spring AI 1.1+ (it’s a community-driven project: org.springaicommunity:mcp-server-security). If you need authorization on your MCP tools — and you absolutely should — you’re locked into WebMVC with Spring AI 1.1+.
I picked WebMVC SSE for this article because it’s the most widely documented and understood. But for greenfield projects, I’d start with Streamable-HTTP and plan the 1.1 upgrade.
Spring AI MCP Security Patterns
In my agent loops article, I described how we burned through $47K in 6 weeks because our agents had no guardrails. The lesson applies doubly to MCP servers: every tool you expose is a surface area for abuse.
Here’s what I do differently this time:
Rule 1: Never Expose Write Operations Without Explicit Authorization
@McpTool(description = "Cancel an order. Requires ADMIN role.", destructiveHint = true)
@PreAuthorize("hasRole('ADMIN')")
public void cancelOrder(
    @McpToolParam(description = "The order ID to cancel", required = true) String orderId
) {
    orderRepository.findById(orderId)
        .ifPresent(order -> {
            order.setStatus(OrderStatus.CANCELLED);
            orderRepository.save(order);
        });
}
The @PreAuthorize annotation integrates with Spring Security’s SecurityContextHolder. For SSE transport, that means an HttpSecurity config:
@Configuration
@EnableWebSecurity
public class McpSecurityConfig {

    @Bean
    public SecurityFilterChain mcpFilterChain(HttpSecurity http) throws Exception {
        http
            .securityMatcher("/mcp/**")
            .authorizeHttpRequests(auth -> auth
                .requestMatchers("/mcp/message").authenticated()
                .anyRequest().permitAll()
            )
            .oauth2ResourceServer(oauth2 -> oauth2.jwt(Customizer.withDefaults()));
        return http.build();
    }
}
Important caveat: The Spring AI MCP Security module is community-driven (org.springaicommunity:mcp-server-security) and requires Spring AI 1.1+. It’s not part of the core Spring AI 1.0 release. If you’re on 1.0, you’ll need to implement authentication middleware yourself — a HandlerInterceptor that validates tokens before MCP requests reach the server.
Rule 2: Rate Limit at the Application Level
Agents can — and will — call your tools in loops. Without rate limiting, a single agent with a buggy ReAct (Reasoning + Acting) loop can hammer your order service into oblivion.
Since @McpTool methods don’t yet support Bean Validation annotations (this is tracked as Spring AI issue #5921), you need to rate limit at the service or HTTP layer:
@Service
public class OrderService {

    private final RateLimiter rateLimiter;

    public OrderService(RateLimiter rateLimiter) {
        this.rateLimiter = rateLimiter;
    }

    @McpTool(description = "Search orders by customer email. Rate limited to 10 calls/min.", readOnlyHint = true)
    public List<OrderDTO> searchOrdersByEmail(String customerEmail) {
        rateLimiter.acquire(); // Blocks if rate exceeded
        return orderRepository.findByCustomerEmail(customerEmail)
            .stream()
            .map(this::toDTO)
            .toList();
    }
}
Use Bucket4j or Resilience4j — whichever your team already has. The point is: every tool needs a rate limit before it hits production.
Rule 3: Validate Input in the Service Layer
MCP tools receive free-form text from AI agents. AI agents are terrible at formatting. Validate everything — just do it in the service method, not with annotations:
@McpTool(description = "Get order details by order ID. Format: ORD-XXXXX.", readOnlyHint = true)
public OrderDTO getOrder(@McpToolParam(description = "Order ID", required = true) String orderId) {
    if (!orderId.matches("ORD-\\d{5}")) {
        throw new IllegalArgumentException("Order ID must match format ORD-XXXXX");
    }
    return orderRepository.findById(orderId)
        .map(this::toDTO)
        .orElseThrow(() -> new OrderNotFoundException(orderId));
}
The regex check rejects malformed order IDs before they hit your database. It’s not as elegant as @Pattern, but it actually works today.
What Went Wrong: Three Mistakes I Made
Mistake 1: Exposing Too Many Tools on Day One
My first MCP server had 23 tools. Inventory checks, order updates, customer CRUD, payment lookups, shipping queries. The AI agent called all of them. In a loop. On every request.
The fix: Start with 3-5 tools. The agent loops article showed that 3 guardrails is the sweet spot — the same principle applies to tool exposure. Add tools as you validate each one under load.
Mistake 2: Assuming STDIO Works for Everything
I built the entire server on STDIO because the Spring AI examples use it. Then our team tried connecting from a web-based MCP client. STDIO doesn’t work over HTTP. I had to refactor the transport layer.
The fix: Pick your transport based on your consumers, not the examples. If Claude Desktop is your only client, STDIO is fine. If you need web clients, start with SSE or Streamable-HTTP.
Mistake 3: No Tool Usage Telemetry
After two weeks in production, I had zero visibility into which tools agents called most, which failed, and which consumed the most tokens. I was flying blind.
The fix: Add a ToolCallback decorator that logs every invocation:
@Component
public class TelemetryToolCallback implements ToolCallback {

    private final ToolCallback delegate;
    private final MeterRegistry meterRegistry;

    @Override
    public ToolDefinition getToolDefinition() {
        return delegate.getToolDefinition();
    }

    @Override
    public String callToolRequest(ToolCallRequest request) {
        long start = System.currentTimeMillis();
        try {
            String result = delegate.callToolRequest(request);
            meterRegistry.counter("mcp.tool.calls",
                "tool", delegate.getToolDefinition().name(),
                "status", "success").increment();
            return result;
        } catch (Exception e) {
            meterRegistry.counter("mcp.tool.calls",
                "tool", delegate.getToolDefinition().name(),
                "status", "error").increment();
            throw e;
        } finally {
            meterRegistry.timer("mcp.tool.duration",
                "tool", delegate.getToolDefinition().name())
                .record(Duration.ofMillis(System.currentTimeMillis() - start));
        }
    }
}
Now you can see which tools are hot, which are failing, and where to optimize. This is non-negotiable for production.
When Spring AI MCP Server Is the Right Choice
I’ll be honest about where this shines and where it doesn’t:
| Scenario | Recommendation |
|---|---|
| Spring Boot team, need MCP fast | ✅ Spring AI MCP Server |
| Need native images, 30ms startup, 30MB RAM | ❌ Quarkus MCP Server |
| Already on WebFlux, don’t need auth | ✅ Spring AI WebFlux starter |
| Need OAuth2 + @PreAuthorize on tools | ✅ Spring AI WebMVC + MCP Security (1.1+) |
| Maximum protocol control, no framework | ❌ Official MCP Java SDK |
| Multi-server architecture (different endpoints per security domain) | ❌ Quarkus supports isolated servers per app |
The Bottom Line
MCP is becoming the standard way AI agents talk to your systems — 97 million SDK downloads in a year make that clear. For Spring Boot teams, Spring AI’s MCP server gives you the fastest path from annotated method to production endpoint.
But speed without safety is how you get another $47K bill. Three rules I follow:
- Start with 3 tools. Rate limit everything. Add
@PreAuthorizebefore you add your fourth tool. - Pick your transport based on consumers. STDIO for Claude Desktop, Streamable-HTTP for web clients.
- Instrument every call. If you can’t see which tools agents are calling, you can’t protect them.
See the official Spring AI MCP documentation for the latest on transport options and security module availability.
The agents are coming. Make sure your doors have locks.
Related Articles
If you’re building AI agents with Spring Boot, read these next:
- Spring AI Agent Loops in Production: Tool Calling, Memory, and Guardrails — The agent brain: ReAct loops, memory tiers, token budgets, and the $47K lesson.
- Spring AI + RAG in Production: Structured Output, Ollama, and pgvector — The agent knowledge: hybrid search, native structured output, local dev with Ollama.
- What 3 Months of Kubernetes AI Gateway Taught Me About Gateway API’s Real Purpose — The agent infrastructure: model-aware routing, LoRA scheduling, token rate limiting in k8s.
- What 1 Year of AI Coding Assistants Taught Me About Developer Productivity — The developer perspective: four-tool comparison, task-safety matrix, what actually works.
Enjoying the content? Here are tools I personally use and recommend:
- 🌐 Hosting: Bluehost — what this blog runs on
- 🛒 Tech Gear: My Amazon Store — keyboards, monitors, dev tools I use
Purchases through my links help keep this blog ad-free 💙
Enjoyed this post?
Subscribe to the newsletter or follow on YouTube for more dev content.
🎬 Watch Shorts